
Making a Photograph using Adobe Camera Raw and Viveza 2
Photography is much more than taking the shot these day with the advancement of digital camera and post processing software. I want to show you how you can transform a seemingly useless shot into something great using Adobe Photoshop CS4's Camera Raw (ACR) and Nik Software's Viveza 2 plug-in.
First we'll start with our photograph straight out of the camera.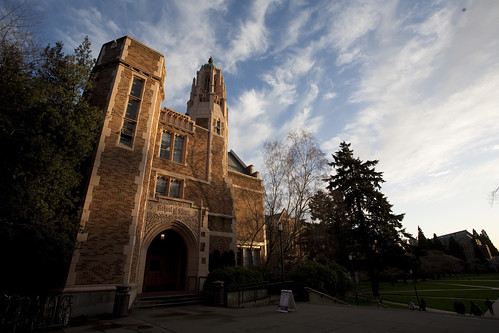
As you can tell this is a very high contrast scene with potentially a lot of detail in the highlights. When I took this shot I was very careful not to overexpose the highlights because that is where much of the interest in the image lies. You can view this on most dSLR's by enabling the histogram view when you're in playback mode. The shadow regions are indicated on the left while the highlights are on the right. You can see the histogram for this photograph as shot in the first panel below.
Here we have screen shots from the sidebar in ACR. The panel on the left shows where the sliders are by default under the first tab (which is where 90% of your adjustments will happen). The right panel shows the same sliders with the adjustments I made. Some of these changes are made to even out the image, for instance increasing the Recovery brings out some detail in the highlights, increasing Fill Light increases the detail and brightness in shadowed regions. I also warmed up the image by moving the Temperature slider to the right (this image was taken shortly before sunset). Finally I increased the Clarity and Vibrance to give the image a little more pop.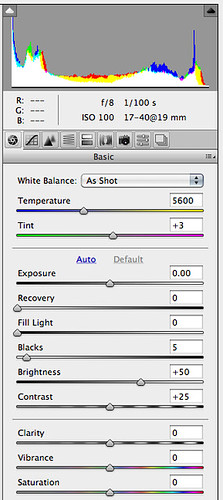

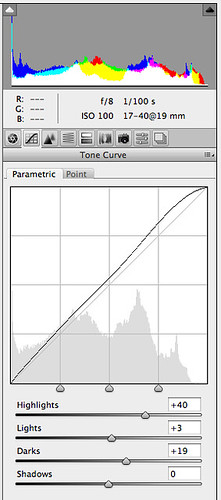
Next we have the sliders from the second tab. Again before is shown in the left panel. Here I have increased the contrast between the highlights and the lights enhancing the appearance of the clouds. I've also increase the brightness of the darks to bring out a bit more detail in the shadows.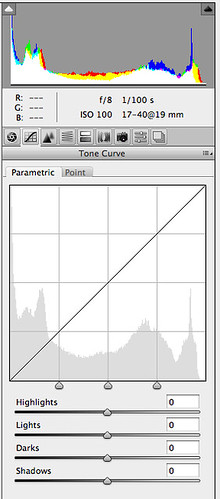
Saturation Tab - giving the sky and grass a little boost.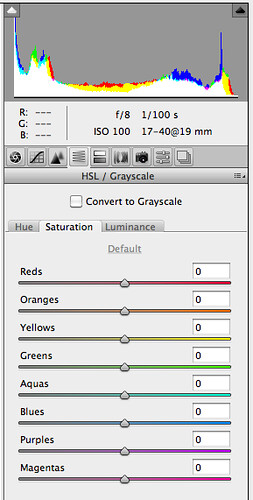

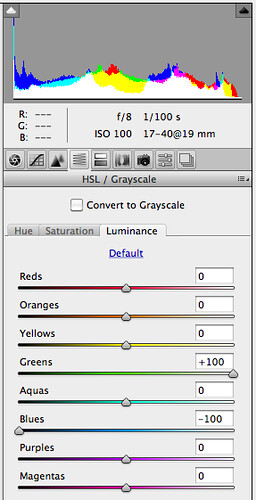
Luminance Tab - reducing the luminance of the blues really helps to bring out a nice rich blue sky that can sometimes make the image look as if a polarizing filter was used.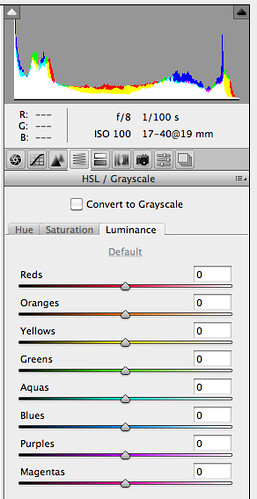
Here is the result of these edits in ACR.
Mouse over the image to see the unedited image.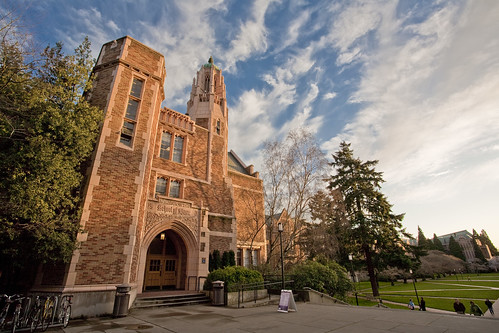
Now we'll open this image in Viveza 2. Here I applied a slight structure and warmth enhancement to the entire image. I then added a control point in the sky and further enhanced the structure in the sky. I added a second control point near the door and enhanced the brightness. A third control point was placed in the grass where I also increased the brightness. A final control point was placed in the lower right region of bright cloud where I reduced the brightness slightly so it did not over power the image.
These type of selective edits are very quick and easy in Viveza 2. The same could be done with layer masks in Photoshop but much more time, effort and patience would have been required. I highly recommend trying the free 14-day trial version of Viveza 2 if you are using Photoshop, Lightroom or Aperture.
Here is the result of these edits in Viveza 2.
Mouse over the image to see the imported image.
Just for final comparison here is final result compared with the initial image.
Mouse over the image to see the unedited image.

No comments:
Post a Comment